In this blog post I will shed light upon how to clone,add,commit,push and pull your code to/from Github.
Disclaimer: I am not a subject expert on git and I am sharing my findings as I learn more about this myself.
Prerequisites:
- Github account.If you don’t have one then create it here.
- Git client , which we will use throughout this git process.Get it here.
- A decent Internet connection with an upload speed of 2.75 Bits Per Second xD
What is git?
A lot has been written about this, so I will not go into too much detail about the definition. However, in one line -
A git is a version control system for tracking changes in computer files and coordinating work on those files among multiple people.
Getting Started
After getting the right tools , we are good to go and create our first repository in Github.Follow the steps below:
- Log into your github account
- Select create new repository
- Give a relevant name and follow through the next steps.
- Finish it!
Now you have an empty repository with a readme and a license file of your own.
Local Access
So you got your own repository online.How can you change the contents of the files there?
Directly editing there and commiting the changes is the first thing which comes to your mind. But you cannot always edit it online.There will be some part of the code which requires the code to be stored locally.There are two ways by which you can get the repository locally.
- Git inits and pulls.
- Git clones.
The first method is a little bit complex.So we will stick to the second method whenever we need a copy of our repository locally.
Clone
Cloning the repository means getting an exact clone of the repository in your local computer.
- Click clone or download option in your repository.
- Copy the clone url to your clipboard.
- Open the git bash on the location where you want the repository locally.
- Type the following command in your shell
git clone [url]
The git bash asks for your username and password tied to your github account. Believe it and give the credentials.It won’t do any harm.Now you got a local copy of your repository.
Changes
Hmm , now you have a local copy of your repository.Let’s say you make changes to your code by adding libraries and functionalities.Your local copy will have additional code compared to the one which is stored on Github.How can you merge both the codes?
- Add the changes to the staging area.
- Commit the changes.
- Push it!
Add
The add command simply adds the changes you made to the staging area. It prepares the code to get committed to the remote repository.The add command is like getting a ticket to travel to a destination[remote repo].You just got a pass to change the code but the changes are not made in the destination until now.Use -A to add all the files.
git add -A
You can check whether the changes are staged by typing the git status command.
Commit
Commit command is like boarding the bus with the ticket issued to you. The bus hasn’t started moving yet.Commit the changes you added to the staging area by typing the following command:
git commit -m "your message"
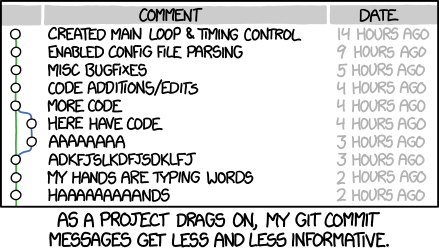
Please write a proper commit message.So that whenever you see the code at a later point of time you will understand what the commit did.
Start the message with “Fix”, “Add”, “Change” instead of “Fixed”, “Added”, “Changed”.
Push
Now that we have boarded the bus , we have to tell the driver to start the bus and reach the destination.We do this by ,
git push origin master
where master is the master branch of the current working repository. (Branches , forks and pull requests will be dealt in a separate follow-up post).
Final Countdown
The git bash will ask for your login credentials again and will start pushing the code once it has been given what it needs.
You can bypass through this setting by globally declaring the username and email initially.
git config --global user.name "Username"
git config --global user.email mailid@example.com
Acknowledgements
Ramkumar , Ganesh and Shri Shruthi were kind enough to teach me the basics of vcs and git. Without them I wouldn’t have had the courage to take up git and learn its basics.
Thanks for reading!
A follow up post ft. Branches , forks and pull requests is coming soon :)
comments powered by Disqus